How do I Change the Blade or Bit on a Power Tool?
Changing the Blade or Bit
| Step | Power Tool Blade Change |
|---|---|
| Safety First | Always wear safety gear, including goggles and gloves; unplug or disconnect the power source |
| Identify Tool Type | Determine if it’s a saw, drill, grinder, etc, to select the appropriate replacement blade or bit |
| Lock or Secure | Use tool-specific locking mechanisms or wrenches to immobilize the current blade or bit |
| Remove the Old | Loosen and remove the retaining nut or bolt that holds the blade or bit in place |
| Install the New | Carefully place the new blade or bit in position, ensuring it’s correctly aligned; tighten the retaining nut or bolt securely |
Importance of blade and bit maintenance
Proper maintenance of a power tool’s blade or bit is essential to get the best performance out of your tool and keep it running safely.
In this article, we’ll discuss the importance of blade and bit maintenance, step by step guides for changing blades and bits, and advice for specific tools.
This is all critical information for keeping your tools in top condition and avoiding problems or accidents.
And, with the right info and the right tools, it’s easy to make sure your blades and bits are always in excellent condition.
So, keep reading and learn how to keep your power tools running smoothly and safely.
Why Blade and Bit Maintenance Matters
Performance
A power tool’s blade and bit play a big role in how well it performs.
When the two are properly maintained, the tool will operate efficiently and consistently yield great results, giving you the quality work you’re looking for.
When they’re not maintained, you’ll likely experience decreased performance.
The tool will be less efficient, leading to labor and material waste, and the outcomes will be less than desirable - cuts may be uneven or not as accurate as you’d like, plus the tool could be more prone to breakdowns.
That’s why proper blade and bit maintenance is critical.
Safety
Using a dull or damaged blade or bit can result in serious injuries while using power tools.
Blades and bits that are not properly maintained can kick back, leading to slips and falls, broken bones, and even deep cuts that could require stitches.
In addition, poor maintenance can make blades and bits overheat, which can cause electrical shocks, burns, and even fires.
To play it safe, regularly inspect and sharpen blades and bits so they stay in top form and critical jobs can be completed with ease.
Tool Longevity
Maintaining your blades and bits regularly can extend the life of your power tools.
A sharp blade or bit reduces stress and can even increase the accuracy of the cuts you make.
By keeping blades and bits clean and free from rust or dirt, they can last longer and work more efficiently.
Additionally, checking for wear and damage and replacing blades or bits as soon as possible can help prevent greater damage and ensure your tools last longer.
Storing power tools properly and replacing worn out parts can help maintain the integrity of your tools and save money in the long run.
Regularly inspecting and taking care of your blades and bits can ensure that your tools are reliable and always ready to use.
General Steps for Blade and Bit Replacement
Safety First: Disconnect Power
Using power tools can be dangerous.
It is important to always make sure you put safety first.
Before replacing the blade or bit on a power tool, be sure to disconnect the power.
This means, either unplugging the cord from an outlet or removing the battery, depending on the tool.
Doing this step is very important and can help prevent accidents.
Not disconnecting the power could cause serious harm or injury.
Always disconnect power before getting started on any blade or bit replacement.
Identify Blade or Bit Type
Make sure to double check the type of blade or bit being replaced.
Look for a manufacturer’s logo or other marking on the package, and check to see if it matches the type on your power tool.
If you can’t identify the blade or bit, take a picture of the tool with you when you go to the store.
You may also be able to use the model number of the tool to help you identify the correct replacement.
Look online or in a user manual to find the right type.
Finally, if you’re unsure, ask a professional or someone who has experience with the same tool.
Gather Necessary Tools
Gather the tools needed for replacement: screwdriver, utility knife, chisel, hammer, adjustable wrench, pliers, ratchet and socket set.
Make sure the power tool is unplugged.
Ensure you have the necessary replacement parts.
Check to see if you also need a dust mask, safety glasses or other protective gear.
Have a light source, ruler and workspace close by.
Finally, grab a marker to label the bolts as you take them out.
How to Change a Blade or Bit on Specific Tools
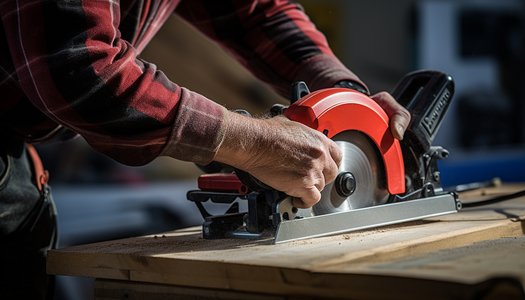
Changing Blades on a Circular Saw
Start by making sure the saw is unplugged, and take off the plastic covering.
Use an Allen wrench to remove the blade from the spindle.
Peel off the washer and remove the blade.
Place the new blade on the spindle, using the washer to secure it.
- Put the nut back in, and screw it to hold the blade in place.
- Tighten the nut with the Allen wrench.
Replace the plastic cover.
Plug in the saw and turn it on to make sure the new blade is secure.
Replacing Bits on a Power Drill
Unplug the drill.
Remove the Phillips head screw.
Take off the back cover.
Insert the new bit.
Make sure to tighten it securely.
Replace the back cover and Phillips head screw.
Plug in the drill to test the bit.
If the bit works, you’re finished.
Switching Blades on a Jigsaw
Gather the necessary tools. Depending on the model of jigsaw, you will need a Phillips and/or flathead screwdriver.
Using the screwdriver, remove the screws that hold the blade guard in place.
- Move the blade guard aside and make the old blade accessible so it can be removed.
- Carefully remove the old blade.
- Place your new blade into the blade guard taking care to line up the groove with the slot where the blade will fit.
- Carefully secure the blade guard with the screws you removed earlier, making sure they are tightened firmly.
- Test that the blade has been installed correctly by running the jigsaw without a blade guard.
Once the blade has been switched out, you are ready to resume with your project.
Changing Bits on a Router
- Unplug your router from the wall.
- Place the router onto a stable surface.
- Insert the new bit into the router.
Push the bit into the router until it locks in place.
Set the depth of the bit by turning the router depth adjuster.
- Plug the router back into the wall.
- Secure the bit in place using the collet nut or chuck.
- Turn the router on and test the new bit.
Advanced Tips and Tricks
Blade and Bit Storage
When it comes to storing extra blades and bits, it’s best to keep them in a safe, out-of-the-way place.
Consider putting a hook on a wall in the garage or workshop, and hang the extras from the hook.
That way, they’re easy to locate and reach when you need them.
Also, try to store blades and bits away from damp, humid areas, since that can lead to rust.
And remember: when you’ve finished your job, put the blades and bits away in the same spot.
That way, you know exactly where to find them the next time you need to change one out.
Frequent vs Infrequent Changes
Replacing the blade or bit on a power tool can be done either frequently or infrequently.
When making frequent changes, like in a professional workshop, it’s wise to consider a quick-change system.
These systems are designed to let you switch out the blade or bit easily and rapidly, saving time and energy.
If you only need to change the blade or bit occasionally, this type of system may not be necessary.
With infrequent use, a more manual approach should do the trick.
Deciding between frequent and infrequent changes is the best way to determine which blade or bit replacement system to invest in.
Fine-Tuning After Replacement
Once you have replaced the blade or bit, it’s important to take a few extra steps before you use it.
First, you should turn your tool back on and adjust or calibrate the settings.
This could include the speed, the torque, or the power.
Next, test out the tool and make sure it is working correctly.
If the tool is not working as it should, you may need to adjust the settings or replace the blade or bit again.
Following these steps will ensure that your tool is operating the way it should.
Safety Precautions
Proper Gear
Be sure to wear the appropriate safety gear when changing the blade on a power tool.
This includes safety goggles to protect your eyes and long gloves to protect your hands and arms.
Wear sturdy, closed toe shoes and a face shield or heavy-duty welding apron when using a tool that has sparks and debris.
Secure any long hair, and remove any loose clothing.
Your pants should be a snug fit and long enough to cover your ankles.
Keep your workspace free of tripping hazards and make sure that tools with blades are stored correctly.
After Changing Checks
After you make the change, run through the checks.
Inspect your work and double-check that the blade or bit is secure.
Make sure that all screws, bolts or clamps are tight.
Also look for anything else that could be loose.
If everything passes your inspection, the power tool is ready to go.
Finally, always wear protective clothing and make sure you are in a well-ventilated area.
This keeps you safe and protects you from the dust generated when using the tool.
Troubleshooting Common Issues
Blade or Bit Won’t Fit
Blade or bit won’t fit? Here are some potential causes and solutions:
- Wrong size blade or bit: Switch with one that fits the tool.
- Blade or bit is stuck: Try a light hammer tap to get it loose.
- Material buildup: Unscrew the blade or bit and clean out any material that might be blocking the fit.
- Part of tool is broken: If the blade/bit holder is damaged, it might not fit right. Replace the damaged part.
- Damaged threads: If the inner threads are damaged, the blade/bit won’t catch.
Try cleaning the threads with a bit of sandpaper or replace the tool.
Wobbly or Unstable After Replacement
If the bit or blade feels wobbly or unstable after being replaced, double-check to make sure that it is properly tightened.
Make sure the connection points on the blade or bit and the chuck are completely aligned.
If the bit or blade still feels wobbly or unstable, use a t-handled wrench to further tighten.
Check the tightness of the collar if it uses one and re-tighten if necessary.
If the blade or bit is still not stable, double check for cracks or damage.
If nothing is found, it may need to be replaced.
Conclusion
Summary
Replacing the blade or bit in a power tool should be done when necessary.
First, unplug the tool and remove the old blade or bit.
Second, inspect the arbor and ensure it is compatible with the new blade or bit.
Lastly, insert the new blade or bit and secure it tightly in the arbor.
This simple process is essential for maintaining the performance and safety of the power tool.