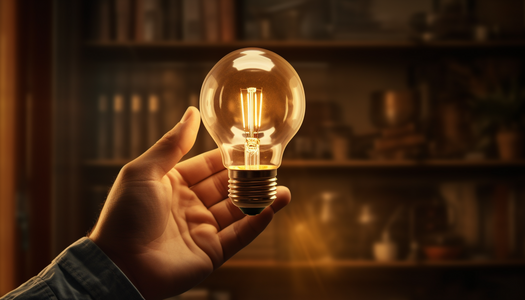
Installing Light Fixtures Like a Pro: Tools and Tips for DIYers
Tools for Installing Light Fixtures
| Tool | Tip |
|---|---|
| Phillips Screwdriver | Check for power before replacing light fixtures |
| Socket Wrench | Disconnect power to wall switch before starting |
| Pliers | Secure wiring connections with electrical tape |
| Small ladder | Wear safety glasses when wiring |
| Voltage Tester | Make sure light fixtures are installed securely |
| Wire Cutter | Always check local code for installation requirements |
| Hammer | Cut off main power when working on light fixtures |
| Wire Stripper | Replace bulbs asper specific wattage requirements |
The importance of proper lighting in your home
Light fixtures can make all the difference in your home.
Proper lighting can create a dramatic impact and increase the comfort and ambiance of your home.
Whether it’s brightening up a once dark corner or saving money on your electricity bill with energy efficient LED bulbs, the right light fixtures can make your home shine.
With proper installation, you can light up a room quickly and easily without spending a fortune.
Learning how to install your own light fixtures is the key to creating the perfect lighting design for your space, and a great way to save on installation and equipment costs.
Installing light fixtures yourself allows for great flexibility in customization and design, turning your home into the perfect sanctuary.
Essential Tools
Tools for Light Fixture Installation
When it comes to installing light fixtures, there are certain tools that are essential.
A screwdriver or a screwdriver set is key for tightening joints and installing the fixture itself.
Wire strippers and cutters help you to work with the electrical wires.
Voltage testers check for electric current and protects you from shock.
Wire nuts and connectors attach the wires together, as well as wire fish tape or cable pullers which help to pull wire through walls.
All these tools help make the project easier and more successful.
Understanding Electrical Safety
The importance of safety when working with electricity
It’s important to make sure the power supply is turned off when working with electricity.
Before you start any project, turn off the main breaker.
Also, it’s best to double-check for any live wires.
Use a voltage tester to make sure the wires are not live.
Electric shock can be extremely dangerous, so it’s important to be sure you’re working in a safe environment.
Make sure to turn off the power and check for live wires every time you work near an electrical project.
It’s the best way to make sure everyone stays safe.
Types of Light Fixtures
Understanding different types of light fixtures
The three most common types of light fixtures are ceiling fixtures, wall-mounted fixtures, and pendant lights.
Ceiling fixtures attach directly to the ceiling, while wall-mounted fixtures mount on the wall to provide direct, task-focused lighting.
Pendant lights, which hang from the ceiling, provide a cozy atmosphere and create more of an intimate setting.
Finally, chandeliers are an increasingly popular choice used for special occasions or to make a larger room appear more intimate.
All these types of light fixtures can create desired moods or atmospheres, so it’s important to understand which types will suit your needs best.
Wiring and Connections
Wiring basics for light fixtures
Connecting wires correctly is key when installing light fixtures.
First, you need to install mounting brackets, where you can attach the light fixture securely.
Then, you need to connect the fixture wiring to a junction box and the electrical system.
To finish up making the connection, you must wrap the connection with wire nuts or connectors, making sure not to overtighten them.
When you’re done, make sure to inspect your work to make sure everything is properly connected.
Mounting and Installing
Mounting and Installing Your Fixtures
Ready to install your light fixture? It’s easy! First, attach the fixture to the mounting bracket using the screws provided.
Secure the base or canopy of the fixture by tightening the screws.
Install your bulbs and shades - line them up and twist them in.
Finally, connect any wiring.
That’s it! You can now enjoy your new light fixture.
Testing and Adjustments
Doing It All While Staying Safe
To install your light fixture, first test it by connecting it to a power source.
Then, make the necessary adjustments for brightness with a dimmer switch or other device, and check for alignment.
Make sure everything is secure, double-checking any mounting hardware, before turning on the power source.
Final check that the fixture is properly connected to the appropriate lighting circuit.
Installing and mounting your fixture should leave you with an attractive, well-lit space.
Troubleshooting Common Issues
Troubleshooting tips for flickering lights
If your lights flicker, it’s time to investigate and fix the cause.
Try replacing the bulb first - you may have just gotten a bad one! If your new bulb still flickers, make sure the light socket is clean and isn’t loose.
If the socket and bulb seem to be okay, try testing the voltage of the wall plug and switch.
If the voltage is low, you may need to check your circuit breaker or other wiring.
If all else fails, hire a pro to inspect the system.
Troubleshooting flickering lights can be a hassle - but sometimes it’s worth taking the time to rule out potential problems and keep your lighting running smoothly.
Dealing with loose fixtures
If you’re dealing with loose fixtures, make sure to check the mounting bracket to ensure that the screws are tight.
In some cases, you may also need to add extra mounting brackets or use wall anchors.
Next, check the wires to make sure they are secure, then twist or tape them, if needed.
Lastly, tighten the mounting screws on the light fixture with a proper sized screwdriver to ensure the fixture is secure.
This should take care of any loose fixtures for you.
Fixing uneven illumination
If the illumination in your light fixture is uneven, make sure the bulbs are tightened.
If they are already tight, you may need to adjust the light shade or switch out the bulbs.
Consider using bulbs with different wattage if one area is too bright or too dim.
To fix uneven illumination, try adjusting the tension screws on the arms connecting the light shade to the fixture.
Loosen or tighten the screws to move the angle of the shade.
You can also try changing the center collection to spread the light in a different pattern.
Finally, replace the bulbs with ones of the same wattage but less brightness.
Finishing Touches
After the Install
Finish up your light fixture installation with a few simple steps: remove all old fixtures and packaging and dispose of it responsibly.
Check your local regulations for how to recycle bulbs and batteries.
Recycle the old light fixtures and any unused components.
Have the right type of container to store the old materials, making sure to place them in the right bin or trash can.
Don’t forget to take safety precautions while handling old wiring or electrical items - never put them in the regular trash! And last but not least, give yourself a pat on the back for a job well done - you just installed a light fixture like a pro.
Take a step back and take a minute to admire your handiwork.
Your newly installed light fixtures look amazing and you can be proud of your efforts.
Let the golden glow fill the room and brighten the mood.
Give yourself a pat on the back and a treat for a job well done.
Then take a break and take a moment to admire your good work.
You’ve taken your home decorating skills to the next level and you should be proud! Now it’s time to relax and enjoy the beautiful light cast from your new fixture.
Conclusion
Essential Tools for DIY Light Fixtures
Make sure you have the proper tools for installation of your light fixtures.
A cordless screwdriver, level, wire stripper, voltage tester, utility knife, and wire cutters are all essential.
You’ll want to get a good ladder or step stool for correctly installing a light fixture on higher-elevation walls and ceilings.
You may also need a fluorescent light bulb for certain fixtures.
To stay organized, have a designated tool bag to store the items you need.
Proper safety equipment should also be worn, such as goggles and gloves.
Have propane or battery-operated torches if needed.
Also, make sure to read directions and all safety issues first before you start installing a light fixture.
These tools and tips are essential for installing light fixtures like a pro.