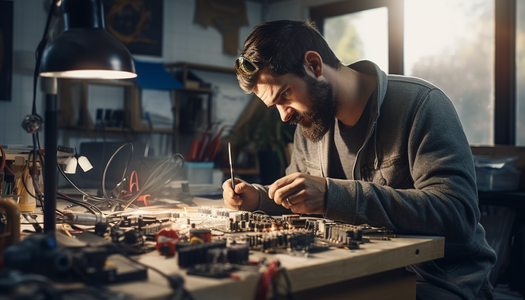
Must-Have Tools for Pursuing DIY Electronics Projects
Top Tools for DIY Electronics
| Multimeters | Used to measure voltage, current, and resistance |
| Soldering iron | Used to attach wires to components |
| Wire strippers | Used to prepare insulation for soldering |
| Flux pen | Used to help components fuse together |
| Snippers | Used to cut component leads |
| Screwdrivers | Used to tighten screws in projects |
| Crimper | Used to attach and secure terminal ends |
| Helping hands | Used to hold small components steady |
| Pliers | Used to help working with components |
Equipping Your DIY Electronics Projects
Having the right tools for your DIY electronics projects is essential for successful and safe completion.
You will need access to reliable resources, experience, and parts for your projects.
Pliers, multimeters, as well as soldering kits, are all essential tools that will help you get tasks done quicker and more accurately.
Safety glasses should also be worn while working on projects to protect your vision from stray sparks or dirt particles.
Make sure to have all parts and tools ready before you start and get help if you’re not sure how to use them.
Invest in sturdy equipment that you can reuse for various projects.
This is the best way to get the most out of your DIY electronics projects!
Getting Started: The Basics
Soldering Iron
Soldering is an important skill to master when working on electronics projects.
A soldering iron is the most essential tool to have on hand.
Different irons may vary greatly in size, power, and temperature range, so it’s important to choose the right one.
Smaller irons are great for basic electronics projects.
If you’re handling large components, you’ll need a higher wattage iron that heats up quickly and works at a range of temperatures.
Quality irons last longer and provide better results.
Look for brands with good reviews and warranties.
Don’t skimp out on a good soldering iron, as it’s the heart of any electronics project.
Multimeter
A multimeter is a handy tool for DIY electronic projects.
It lets you measure voltage, current, resistance, and continuity.
It’s important to test components before you use them, and a multimeter makes it easy.
To measure the voltage of a battery or a power supply, connect the multimeter’s probes to the positive and negative terminals.
To measure resistance, set the dial to Ohms and touch the probes to the circuit.
Multimeters can also be used to test continuity or identify whether two points are connected.
When starting a project, make sure you have a multimeter available.
Wire Strippers and Cutters
Wire strippers and cutters are essential tools for any DIY electronics project.
Wire strippers quickly remove insulation from wires, while cutters slice through metal wires and components.
When using these, it’s important to make sure the wire stripper is the correct size for the gauge of the wire.
Different cutters have different uses, so choose the right one for the job.
Safety goggles and gloves are important because of the risk of small metal shards or corrosive liquids.
Make sure to neatly organize your wires and components too!
Breadboard
A breadboard is a must-have tool for electronics projects.
It’s a reusable plastic board that has metal strips running down both sides, which are used to make connections between components.
With a breadboard, you don’t need to solder and can quickly try out different circuits to test out ideas.
It’s also great for prototyping and changing components, as you don’t have to take apart the circuit when you want to switch something out.
Breadboard shapes and sizes come in different variations, so you can find one that meets the needs of your project.
Advanced Tools for the Enthusiast
Oscilloscope
An oscilloscope is a great tool for a DIY electronics enthusiast.
It’s used to visualize electrical signals in real-time.
With a scope, you can check the shapes of spikes, updates, and other wave forms to make sure the wiring is working right.
Going beyond basic diagnostics, oscilloscopes help you troubleshoot problems in circuits and electronic components.
With an oscilloscope, you can practically ‘watch’ electricity! It’s an invaluable tool for any electronics hobbyist, because nothing else can give you such a detailed real-time view of an electrical signal.
A must-have addition to any toolshed.
Logic Analyzer
If you’re an experienced DIY electronics enthusiast, a logic analyzer can be an incredibly useful tool for making sure your digital circuits are working as intended.
It allows you to observe what’s happening inside of a circuit without having to probe each component.
This makes it easy to pinpoint any signals or wiring problems that may be present.
And by using a logic analyzer to look into the behavior of a circuit passively, you can determine when something’s wrong without running the risk of damaging any components.
With a logic analyzer, troubleshooting your digital circuits is as easy as it gets!
Power Supply Unit (PSU)
PSUs are essential tools for anyone looking to safely power their DIY electronics projects.
PSUs give the user control over the voltage and current of the project’s power source.
They’re also great for providing protection by preventing any sudden electrical spikes, overheating, or system errors.
A well-made PSU is the key to successful electronic projects, as it ensures the user has efficient power and the right balance of current.
Without a PSU, it’s impossible for DIY enthusiasts to pursue their dream projects with complete peace of mind.
Invest in a quality PSU and create the projects of your dreams with ease.
Hot Air Rework Station
A Hot Air Rework Station has all the right stuff for electronic pros.
It’s a complete soldering/desoldering system that can quickly attach and detach surface-mount components with precision.
It can heat up fast, has adjustable temperatures, and can even be used to remove repairs and clean boards.
Its powerful hot air nozzle can reach hard-to-access places and powerful vacuum suction can hold boards in place during work.
It’s the perfect tool for any intensive soldering or desoldering project.
Handy Accessories and Kits
Soldering Accessories
Solder is an essential tool for any DIY electronics project.
Flux helps solder stick to the surfaces it needs to attach to, and soldering iron tips need to be kept clean with a special tip cleaner.
For more stubborn stuck-on residue, a solder sucker can help.
This powerful tool vacuums up the excess solder in just a few presses.
Get all the right tools in a reliable soldering kit and you can get mini electronic projects done in no time.
Electronic Component Kits
Component kits are great for DIY projects! Get all the pieces you need - resistors, capacitors, transistors, LEDs, and more - all in one convenient package.
Perfect for making sure you have everything you need to get the job done - no more searching all over for a particular component.
Kits often also come with instructions and projects included, so you’ll be up and running starting your own projects right away.
And if you’re just starting out with electronic projects, component kits are a great way to get a feel for all the components and get an idea of what each one does.
Pick one up today and start building!
ESD (Electrostatic Discharge) Protection
Static electricity can be a real pain for people doing electronics projects.
It can damage sensitive components like RAM chips and power supplies.
To avoid any of these nasty shocks, you should use wristbands and mats called ESD protection.
They protect by draining away the static electricity, keeping your electronics safe from harm.
It’s also a good idea to ground yourself with an ESD wristband if you’re using any device that produces static electricity.
Use an anti-static mat on the workbench too.
With ESD protection, those static shocks will be no more than a distant memory!
Magnifying Lamp or Third Hand
Accuracy is important when pursuing DIY electronics projects, and a magnifying lamp or a third hand can help a lot.
Magnifying lamps feature a bright light and an adjustable lens that inspects small parts and components in great detail.
A third hand can be secured to the tabletop and can act as an extra pair of hands, providing extra stability when soldering and gluing.
Combined, magnifying lamps and third hands are highly useful for whenever precision and inspection are necessary.
Organizing Your Electronics Workshop
Component Organizers
Having plenty of small components on hand is essential for any DIY electronics project.
Keeping them organized is key to making sure your workshop remains efficient and clutter-free.
A great way to store compact components is with a component organizer.
These containers come in a variety of sizes and shapes to suit any need.
Clear plastic storage boxes with interchangeable inserts are perfect for organizing small resistors, capacitors, and transistors.
Wall-mounted racks are ideal for projects using larger integrated circuits.
Additionally, storage bags are excellent for carrying your components to wherever your project requires.
With something for everyone, component organizers should be a part of every electronics workshop!
ESD-Safe Workbenches and Mats
A static-free and safe workshop starts with an ESD-safe workbench and mat.
ESD stands for electrostatic discharge, which can damage electronic components.
A workbench designed for ESD safety should have an anti-static mat and wrist strap attached to it.
This setup allows you to work safely on your project without the risk of static electricity.
An ESD-safe workbench and mat can provide the safeguard you need for your electronics workshop.
Make sure to properly line up and secure the mat and wrist strap before starting your project.
This will make sure your project is completed safely and correctly.
Tool Racks and Holders
Keep your workshop organized by using tool racks and holders.
Stash frequently-used tools like wire cutters and pliers in a shelf on the wall for easy access.
Hang screwdrivers and screwdriver sets on mounts to help you find them in a pinch.
Use pegboards for small tools like hex keys.
Reorganize with a magnetic tool holder.
Mount it to the wall and never hunt around for the right screwdriver again.
Place a toolbox or tool chest nearby for when you need something more heavy-duty.
Don’t forget to label those shelves and racks too - it’ll help you find your stuff quickly.
Your workshop will soon be organized and ready to tackle any DIY electronics project.
Safety First: Ensuring a Safe DIY Electronics Journey
Always Unplug Before Working
Always unplug before working to keep yourself safe from electric shocks and short circuits.
Avoid contact with exposed wiring and plug sockets.
Check for signs of damage before you touch them, or if you feel an electric shock while touching them.
Check tools for damage before you use them.
If you see sparks coming from an electrical device, unplug it and don’t touch it until it’s been repaired.
Pay attention to the warning labels on power supplies and other electrical tools.
Keep tools away from water sources and follow the manufacturer’s safety instructions.
Stay in a dry area when working and keep tools away from flammable materials.
Use Protective Eyewear
When working with electronics, it’s important to always wear protective eyewear.
This is because of solder splashes and fragment fly-offs when components break.
When solder splashes, the hot materials can cause serious damage to unprotected eyes.
Likewise, when a component shatters, pieces can fly off and cause injuries.
So, it’s best to always use protective eyewear when working with electronics to stay safe.
Ventilate Your Workspace
Always keep your workspace well-ventilated when soldering.
Prevent potentially dangerous fumes from building up by keeping a window, fan, or air purifier on in the room.
Make sure the direction of the fan is pointed away from your workspace, blowing air out of the room.
Next, work in a location where you won’t have to inhale any of the smoke created from soldering.
Avoid breathing in the smoke and use a respirator, if necessary.
Lastly, don’t forget to also dispose of your scraps properly, as some metals can be toxic if inhaled.
By following these simple steps, you’ll be on your way to a safe and successful DIY electronics journey.
Conclusion
The Joy of DIY Electronics Projects
DIY electronics projects are incredibly fun and rewarding.
Working on these projects gives you the opportunity to learn new skills, push your creativity to the limit, and ultimately bring your ideas to life.
With the right tools, like a soldering iron, hand drill, wire stripper, and safety glasses, you can turn your ideas into a reality.
You’ll also need basic electronics components, like resistors, light-emitting diodes, motors, connectors, and batteries.
By having all these components and tools ready, you can easily design and build whatever your imagination brings to life.
So, take your time and explore DIY electronics projects - you won’t regret it.