Nailing It: The Art of Using Nail Guns for Quick and Efficient DIY Projects
Using Nail Guns For Work
| Point | Description |
|---|---|
| Cost | Investing in a quality nail gun can save a lot of time and money |
| Suitability | Nail guns are suitable for many diy projects, from fixing broken boards to framing walls |
| Safety | Nail guns are powerful tools, but safe to use when used responsibly and with the user properly trained and equipped |
| Type | There are nail guns that use various types of nails and techniques to get the job done |
| Time | Using a nail gun can make most diy projects complete faster and with fewer mistakes |
Why Nail Guns?
Nail guns can help any DIY project move along quickly and efficiently.
In addition to their speed, these tools are also good for accuracy.
Nail guns can fire nails in the exact spot you want, saving time and effort.
Plus, it’s harder to miss a nail when you’re using a nail gun.
Nail guns are also great for difficult angles and tight corners.
Crafty DIYers can even use their nail gun for specialized projects, like installing decorative trim or moldings.
And last, but certainly not least, some nail guns offer features that let you customize your projects, like adjustable depth settings for a more consistent look.
All in all, nail guns are an invaluable tool for any DIYer.
Article Objective
Nail guns are handy tools used for quick DIY projects.
In this article, we’ll discuss the different types of nail guns, their applications, and tips for safe and efficient use.
You’ll learn about the different types of nail guns, the types of nails they use, and the different applications of each type.
We’ll also discuss safety tips for using your nail gun, to help avoid any dangerous mishaps.
With the right nail gun setup, you can achieve precision and save time for your DIY projects.
You’ll also find out which types work best for what kind of projects.
We’ll offer tips to help you make your nails tight and neat, so you can get the best results.
Understanding Nail Guns
Basic Anatomy
Nail guns have certain parts that are important to know.
The trigger is the part you press to tell the nail gun to fire a nail.
The magazine is where you place the nails and it will feed into the nail gun.
Last, the nose is the part that you place against what you’re nailing so it can fire the nail.
It’s important to know which part is which so you’re not trying to put nails in the wrong place or pressing the trigger when it’s not necessary.
Knowing the anatomy of a nail gun is key for using it properly and getting the job done!
How They Work
Nail guns come in three types - pneumatic, electric, and gas-powered.
Pneumatic nail guns use compressed air to power the device.
When the trigger is pulled, air traveling through the hose connects to the piston, forcing itA to drive the nail into the intended surface.
Electric nail guns use a motor to launch the nail.
An electric circuit sends a signal to the motor, which drives the piston to propel the nail.
Gas-powered nail guns use fuel to generate the power necessary to eject the nail.
The fuel is ignited, and the resulting pressure pushes the piston forward to fire the nail.
All these types of nail guns use similar methods to drive nails into materials and finish projects quickly and easily.
Power Source Types
Nail guns come in three different power source types: corded, cordless, and pneumatic.
Corded nail guns use an electric cord plugged into a wall outlet for power, while cordless nail guns are powered by a battery.
Pneumatic nail guns have an air compressor that drives the nail into the material.
Each type of nail gun has its own pros and cons.
Corded nail guns are less expensive, but require an electric outlet nearby and their cords can be dangerous if they move around.
Cordless nail guns provide convenience since you don’t need a wall outlet, but they are more expensive and need to have their batteries recharged often.
Pneumatic nail guns are powerful and don’t need recharging, but they need the extra equipment of an air compressor and they are the most expensive.
Choose the right power source type for your project for successful DIY nailing.
Types of Nail Guns
Framing Nailers
Framing nailers are perfect for projects that involve more heavy-duty nailing.
This type of nailer is great for framing houses or decks, as it can handle bigger jobs quickly and easily.
The nailer comes with larger nails and offers a variety of depth settings, helping you make sure that all your nails will go in straight.
With its powerful nail-firing capabilities, you can drive in nails quickly and confidently.
Plus, it contains an adjustable shingle guide, to help you easily place nails in the paper of shingles.
Framing nailers make your DIY projects a breeze!
Finish Nailers
Finish nailers are a type of nail gun specialized for projects that require a smoother, precise finish.
They often use smaller nails than other types of nail guns, and can be used to attach trim and molding.
Finish nailers should only be used on projects where you want the smallest possible nail hole.
They can also help create a much smoother and sharper finish on your project.
Finish nailers are perfect for attaching shingles, crowns, frames, wainscoting, door and window casings, and more.
Finish nailers are a great tool for precise and professional-looking projects.
Brad Nailers
Brad nailers are a special type of nail gun designed to help you quickly and easily attach lightweight trim.
With a narrow head and a short body, these nails fit right through most materials without damaging them.
You can make fine adjustments to fit, and you won’t have to worry about splitting the material like you do with larger nails.
Brad nailers are perfect for trim, molding, doors, cabinets, picture frames, and other DIY projects.
They’re just the right size to leave a professional-looking finish, while also being strong enough to keep your project secure.
With a Brad nailer, you’ll be able to finish your project faster and with better results than by using traditional tools.
Roofing Nailers
Roofing nailers are specially designed to quickly and efficiently nail roofing materials.
They have a longer magazine, which is great for when you need to cover a large area.
They create a neat, uniform finish and use nails and coil nails with wide applications for all types of roofing projects.
Roofing nailers also have adjustable pressure settings, which allows you to tailor the nail size to the material and thickness so you can work faster and more precisely.
They come in gasoline-powered or electric models, which are perfect for indoor or outdoor work.
Staple Guns
A staple gun helps you get the job done quickly.
It’s a tool used for fastening thin materials like fabric or paper to wood surfaces.
To use, just load the staples into the gun and then press the handle down to shoot the staples into the wood.
There’s no need to put in extra effort, since the gun does the heavy lifting for you.
Staple guns can be used for a variety of applications, from furniture upholstery to home decor and repair.
Plus, they make it easier to get the job done in a fraction of the time.
So if you want to fasten thin materials to a wood surface quickly and easily, a staple gun is the right tool for the job!
Choosing the Right Nails
Nail Length
When choosing nails, it’s important to consider the length.
Nails that are too short may not be able to secure the materials, and nails that are too long can punch through the backside of the material.
The right length should provide enough holding power and should also be short enough to be driven in without damaging the surface of the materials.
Be sure to check the material often during the process to make sure that the correct length was used.
When in doubt, use a slightly longer nail to make sure that a secure hold is provided.
Material
Nailing materials can range from steel nails to aluminum nails and everything in between.
When it comes to choosing the right nail, you need to consider the project you’re working on.
Steel nails are the strongest and longest lasting, but they’re heavier and more expensive than lighter alternatives.
Aluminum nails are lightweight and ideal for framing applications.
Brass nails are harder and more corrosion-resistant than other metals.
Other materials include plastic, copper, and stainless steel.
Knowing what the project requires will help you choose the best nail for your needs.
Gauge
The gauge of a nail is the thickness of the shaft.
It is important to understand the different gauges and how they affect the performance of a nail gun project.
A higher gauge number means the nail is thinner, while a lower gauge number means the nail is thicker.
Thinner nails are good for trim and for delicate projects, while thicker nails are better for heavier loads and projects that require a stronger hold.
It’s important to choose the right gauge for your project to make sure it’s successful.
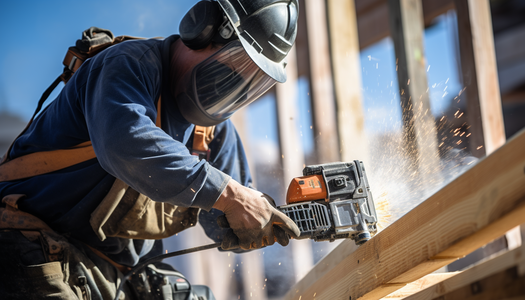
Safety Precautions When Using Nail Guns
Protective Gear
Safety glasses, gloves, and hearing protection are key to stay safe when using nail guns.
Safety glasses help block flying debris as the nail is fired.
Your eyes are especially vulnerable since the gun makes a loud noise.
Gloves protect your hands from the heat generated by the gun as well as splinters.
They also give you better grip on the tool.
Hearing protection guards from harmful noise levels.
Without it, you may suffer hearing loss or even damage to your hearing nerves.
Take the time to put on these important pieces of safety gear before starting your DIY project.
Trigger Safety
Before using a nail gun, it’s important to understand how the trigger works.
To ensure safety, it’s crucial to decouple the power source from the tool.
This will prevent unwanted or accidental nail shooting.
Also, only use the nail gun when the trigger is in position and only use your index finger to hold down the trigger.
Never leave the trigger in the down position, as it could result in injury.
Before firing the nail gun and each time you reload the gun, double check that the safety lever is secured.
Finally, never try to operate the nail gun with other objects or hands that could hinder the proper operation of the trigger.
Follow these steps to ensure safe triggering so you can focus on tackling your DIY projects.
Air Pressure for Pneumatic Guns
When using a pneumatic nail gun, you should make sure to check the air pressure setting.
Most nail guns require anywhere from 70-120 PSI, depending on the model.
You should always make sure to set your nail gun to the recommended PSI to avoid driving nails too deeply or not deep enough.
Additionally, when filling your nail gun with air, you should always check for leaks before using it.
To check for leaks, you can spray the nail gun with soapy water.
If there are bubbles, there is a leak and you must replace any broken O-rings.
Pro Tips and Techniques
Angle of Attack
Remember that the angle of attack makes a difference when it comes to nailing it! Avoid using your nail gun straight on, as it can cause jamming or misfires.
Aim the nail gun at a forty-five degree angle in line with the nail target so the pressure of the nail is delivered accurately and efficiently.
Angle your gun so the nail goes in like a nail and comes out like straw.
Keep that angle consistent and you’ll nail it every time.
Sure, it may sound tricky, but with a bit of practice, you’ll nail it in no time.
So why not give it a try and start nailing it today?
Staging Nails
Take the time to set up your nails before starting to tackle your DIY projects.
Have a container on hand to store loose nails for an efficient system.
Grouping different sizes makes it easy to find the right nails.
Take the time to count the number of nails being loaded so you don’t need to stop and count again while you work.
Be sure to insert the nails into the magazine the right way around so they’re ready to go when you set up the nail gun.
And before operating the gun, check the nails to make sure they aren’t bent or damaged - this will mean less time wasted on ill-fitting nails.
Checking Surfaces
Before beginning a nail gun project, it’s important to check the surface.
Make sure all dirt and debris is cleared away so that the nails will secure properly.
Look for any objects that may obstruct the nail – this could be anything from electrical wires to rusty nails and screws.
Moving any obstacles will prevent hammer blows and ensure the nails do their job.
Take time to make sure the surface is flat and firm.
Check for any soft spots; these should be either repaired or avoided when nailing.
Once you are sure of a clear surface, you will be ready to start your nail gun project.
Maintenance and Cleaning
Routine Inspection
Checking your nail gun for wear and tear is an important part of a regular routine.
Give your nail gun a once-over, looking for any frayed wires, rusted screws, or worn parts.
Listen for strange noises and make sure all moving parts move correctly and smoothly.
Keep an eye out for leaking oil and make sure all hoses and air chambers are properly sealed.
Perform a test to check the firing rate and pressure.
Replace damaged or worn pieces, and if you still have trouble, call a professional.
Regular maintenance to detect wear and tear is a must for any nail gun.
Cleaning the Magazine
Make sure to clean the magazine of your nail gun regularly.
If you use the tool a lot, it’s a good idea to clean it after each job.
Otherwise, give it a thorough cleaning every three to six months.
First, remove the magazine from the tool and empty out all nails leftover inside.
Then, use a soft brush or rag to clear out any sawdust, dirt or debris that may have built up inside.
Wipe down the outside of the magazine and attach it back to the gun when you’re finished.
This will help prevent jamming and other problems.
Storage
When it comes to storing your nail gun, it’s important to find a safe place that’s out of the way and away from children.
You don’t want to just throw it in a corner of the garage once you’re done using it.
Put it in a toolbox or designated area and make sure it is labeled so everyone knows it’s a tool.
Be sure to store it in a clean, dry place and use a lock or key to keep it secure.
Make sure it’s not in direct sunlight, which could lead to rust, and keep the right kind of oil nearby so you can lubricate it before using it.
Follow these steps and your nail gun will stay safe and ready for your next project.
Conclusion
Summary
Having a nail gun is an essential tool for quick and efficient DIY projects.
Not only does it make the job quicker, but it also ensures precise accuracy and a professional finish.
Having the knowledge to confidently use a nail gun makes it even more valuable and accelerates projects; saving time and money in the long-term.
In summary, this article has detailed the best approaches for using a nail gun for DIY projects.
With the right technique and safety procedures in place, it’s possible to master the art of using a nail gun and create successful projects.