Plunge into DIY: Exploring the Versatility of Router Tools in DIY Home Projects
Router Tools for DIY Projects
| Benefit | Explanation |
|---|---|
| Affordable Cost | Can be Used Cost Effectively for Almost any Job |
| Save Time & Money | Quickens Jobs of All Difficulty Levels |
| Multiple Projects Accommodated | Assists With Various Types of Material |
| Maximum Efficiency | Useful Design for Small Projects to Large |
| Smooth Finish | Gives A Nice Finish To Your Work |
The Power and Versatility of Router Tools
A router tool is an essential addition to any DIY enthusiast’s toolkit.
Its power and versatility make it a perfect choice for a wide variety of home projects.
With a router, you can cut and shape materials for furniture, decor, and any other kind of build.
Whether you’re creating cabinetry, woodworking, or even sign carving, you can use a router to make precise, intricate, and polished details.
Router tools are a valuable asset to DIY enthusiasts because they allow them to take on any number of projects - big or small.
Getting to Know Router Tools
What is a Router Tool
A router tool is an essential tool for woodworking DIY projects.
It’s a powerful electronic tool that uses a spinning bit to cut and shape wood.
It comes in two main types - handheld and table-mounted - and has a variety of uses.
The primary function of a router tool is to create perfect cutouts and groove edges in wood or plastic.
It can also be used for decorative applications like creating repetitive patterns or for cutting ornamental shapes on wood.
With the right bit, a router tool is capable of creating intricate shapes and designs in surfaces.
Different Types of Routers
There are three types of routers you need to be familiar with when you’re talking DIY home projects.
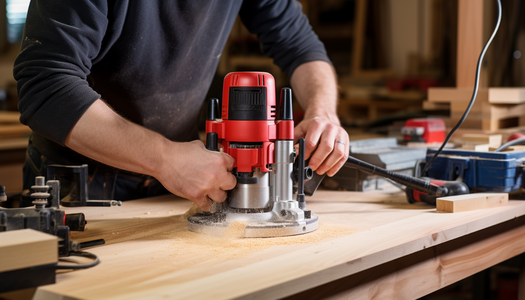
The first kind is the plunge router.
It allows you to adjust the depth of your cut with a lever that you can push in or pull out.
The second is the fixed-base router.
This kind is used for making straight and simple cuts.
Its shape and size won’t change, so you can count on it for consistent precision.
And finally, there’s the combo router.
This handy tool combines the plunge and fixed-base features, making it perfect for both small and large projects.
So get to know all three kinds of routers—then you’ll be ready to plunge into a variety of projects!
Essential Features to Consider
Are you taking the plunge into router tools for DIY projects around the house? Horsepower, speed settings, and other features help you create a smooth, accurate, and efficient process.
Look for tool features like variable-speed control and adjustable depth stops.
Higher horsepower tools will make plunge cuts and can handle large bits.
Look for soft start motor and electronic speed control if you need a smooth start up.
A spindle lock will let you change bits quickly.
If you’re using edge routers, make sure they offer a base switch to change from the plunge to router base.
Also consider eye protection shields to reduce dust and orbital action which will give you smoother cuts.
Lastly, check the weight of the tool and its ergonomic features for comfort while you’re working.
Router Tool Safety: A Primer
Safety Gear
Working with routers can be dangerous, so it’s important to wear the right safety gear.
Wear eye protection such as safety glasses to protect your eyes from any small debris that may fly off when you are routing a piece of material.
Make sure they are snug and wrap around the sides of your face for maximum protection.
Ear protection is also important to protect your hearing from any noise the tool might make.
Cushion your ears with either earmuffs or earplugs while you work.
Taking these necessary precautions can make sure you stay safe and your projects successful.
Handling Precautions
When handling a router tool, be sure to keep it away from your face and body.
Never touch a router bit while it’s spinning and always wear safety glasses.
With the router tool off, grip it firmly by the handles and do not exert excessive pressure.
When turning it on, take a few steps back and keep your hands and other body parts away from the bit.
Make sure the router tool is securely mounted before working and remember to keep it unplugged when changing the bits.
Finally, turn the router tool off when it’s not in use to ensure safety.
Workshop Safety
Before beginning any work, it’s important to be safe.
Make sure your workspace is decluttered to protect yourself against potential hazards like slips and trips.
Set up a good lighting system to help minimize the chances of mistakes.
Even when working with small tools, make sure to use good posture and lifting techniques to prevent potential injuries.
Wear eye protection and gloves to protect yourself from any flying debris.
Remain aware of your sharp tools and secure them after use.
Keeping your work area clean, orderly, and free of risks of harm will help you complete your projects without incident.
Essential Bits and Attachments
Straight Bits
Straight bits are essential for router tools in DIY home projects.
These mini-drills are great for making joinery cuts on dovetails, finger joints, and rabbets.
They come in various sizes for different projects and depths of cuts.
Straight bits can also be used to create mortises and decorative patterns in woodworking.
edging corners and creating grooves are other practical uses for straight bits.
Though the most common router bit, they come in various styles such as two flute, four or two flute, two-piece, plunge cut, and down spiral.
They all offer different advantages when crafting wood projects.
No matter the size or design, straight bits remain a handy and versatile tool for DIY home projects.
Round-Over Bits
Round-over bits are a great way to get smooth, rounded edges on your DIY project.
They rotate on a spindle and are used to create an elliptical shape with a large radius.
To get the desired shape, adjust the depth of the bit and the speed of the router.
Make sure to use slower speeds for bigger radii and faster speeds for smaller.
When cutting an edge, place the edge onto the bit, and use a guide to keep the material in place.
The results will be beautiful, rounded edges, perfect for completing any project.
Rabbeting Bits
Rabbeting bits are essential for adding strength and durability to DIY home projects.
They come in several sizes and are designed for cutting rabbet joints.
To use, simply install the bit into the router, set the cutting depth, and create the rabbet along the edge of the workpiece by guiding the router along the edges.
To adjust the width of the rabbet, simply adjust the cutting depths.
Suitable for both soft and hard materials, routered rabbets securely join two pieces together and add detail and design.
With routered rabbets, you won’t be limited when making DIY projects.
Specialized Bits
Router bit sets are great for standard projects, but specialized bits can up your DIY game.
Edge-forming bits switch up the look of projects like tabletops and chair rails, and unique bearings take on intricate details–the possibilities are endless.
Cove bits create curved edges, ogee bits add elegant curves and heels, and multi-spiral bits tackle square and ellipse edges.
Straight bits are good for grooves and dadoes.
Don’t forget rabbeting bits for box joints.
For curved cutting, follow the grain with rounding-over and Roman ogee bits.
And don’t forget flush trim, dovetail, and mortise templates, essential for finishing and producing projects like perfect dovetail boxes.
Router Tool Techniques
Edge Routing
Edge routing is an essential task that can create a smooth edge finish on your DIY projects.
First, select the router bit size that is appropriate for the project.
Ensure the bit is securely seated in the router.
Adjust the depth of the router bit as desired for desired finish, making sure to use a steady hand.
Begin by routing along the edge until the entire surface is cut.
If you want to add an extra finishing effect, use a chamfer bit to route the edges.
Finish up by sanding the edges with medium-grit sandpaper, then use fine-grit paper for a smooth, professional look.
Template Routing
Template routing is a great way to create identical pieces with a router tool.
Start by attaching a small routing template to the material you are using.
Mark it with a pen or pencil to show the cutter exactly where to begin.
Set the router to the desired depth and speed.
Make sure to start with a shallow cut and gradually go deeper until the template is completely routed out.
If there is a need for multiple pieces, transfer the template onto some medium-weight cardboard and use it as a punch to trace shapes on the material.
Then, repeat the steps above until all the necessary pieces are complete.
Plunge Routing
Plunge routing can be used to make interior cuts in a variety of materials.
To get started, mark the specific area you want to cut with a pencil, then adjust the depth on the router bit to the desired depth of the cut.
Next, move the router slowly over the surface of the material.
Make sure to keep it making constant contact with the material as you move it.
Once you reach the marked area, plunge the router straight down into the material.
Carefully guide it along the marked area to complete the cut.
Finally, raise the router back up off the material to finish the plunge routing.
Creative Uses for Woodworking
Sign Making
Spruce up your space with homemade wooden signs using router tools! With a mitered corner jig and chamfer bit you can craft elegant signage tailored to your aesthetic.
Carve whatever words or designs strike your fancy– the possibilities are endless.
To add intricate patterns, use a plunge router and different sized bits.
Then stain or paint however suits your fancy.
Whether you opt for a memorial plaque or a motto wall hanging, there’s no better way to add personality to your home than with DIY wooden signage.
Inlays
Using a router to create inlays can open up a world of possibilities when it comes to embellishing a woodworking project.
From flowers to stars, the intricate patterns you can design with a router can add a touch of class and sophistication to your work.
It is possible to match different types of wood together to create extraordinary designs.
With practice, you can even create cross-hatch inlays, ornamental border patterns, and other unique designs.
Router tools are a powerful tool for adding dimension and detail to almost any woodworking project!
Dovetail Joints
Woodworking with router tools is a great way to create strong and beautiful dovetail joints.
Router bits create smoother lines than traditional hand-cut joints, giving them a distinctive curved look.
With a router, you can also create the tails quickly and accurately, further strengthening the joint.
Router tools can be used to create dovetail joints in any type and size of wood, from narrow slats to thick planks.
The results can range from utilitarian to ornamental, making it a great way to add a decorative touch to any project.
Home Improvement Applications
Creating Shelves
Creating shelves is easy with the right router and some basic tools.
First, measure your shelf and select the desired board thickness for the supports.
Cut the boards and install a bit in your router to shape the joints for a snug fit together.
Use a drill to make pilot holes to ensure secure joints and tie the pieces together with screws.
You may want to taper the ends of the boards for a more elegant look.
Sand and finish and you’ll have strong, stable shelving that looks great.
Trim and Molding
Adding trim and molding to a room gives it a finished look and can draw attention to your favorite features.
Use the router to add a simple border of ¼ inch beveled trim, or a 5-degree bevel for a more advanced cut.
An ogee detail can be cut along existing walls or next to windows and door frames for a decorative touch.
Not sure where to begin? A cove molding along a ceiling can create a more finished look.
Need something a little more adventurous? A detailed chair rail can create a unique and polished appearance.
With router tools, the design options are endless!
Cabinet Making
Making custom cabinets is a creative way to bring your unique vision to life in home improvement projects.
Measure the space where the cabinets will be placed and ensure the pieces fit before you begin.
Use router tools to quickly create dadoes and rabbets for added depth and strength.
Cut the boards for the shelves, sides and back to size and then assemble them together.
Then, join the sides, shelves and back boards with glue and nails or screws.
Add the back panel and then attach the hardwood facing, doors, and hardware.
Finally, sand and stain or paint the cabinet for your desired finish.
You can now proudly display your custom cabinets in any room.
Building Custom Frames
Custom frames are a great way to show off a beautiful piece of art or a treasured photo.
With a router, it’s easy to create unique, personalized looks for frames that can be hung on a wall or proudly displayed on a table.
Various router projects can be used to build frames of all sizes and shapes, making it easier than ever to achieve the look and feel you want for your artwork or photo.
From cutting the frame pieces from wood to adding decorative details, quickly build a custom frame that perfectly complements the piece being framed.
Routine Maintenance and Care
Cleaning Bits
Cleaning bits regularly will help keep your router tools in good condition.
Before every use, wipe away any loose dust or debris and check for any small particles.
If you need to use a brush, use one that’s made of plastic or very soft bristles so you don’t damage the bit.
Between uses, clean off the bit with a cloth and store in a safe place to avoid any rust or dirt buildup.
Be sure to use a cleaning solution that’s compatible with the material of your router bit.
To maintain the maximum sharpness of your bits, sharpen them according to the manufacturer’s instructions.
Lubrication
Regular lubrication is key to keeping your router working in top condition.
When parts of the router sound rough or slow, it’s a sign they need to be lubricated.
A few drops of lubricant on moving parts helps the router run at optimal performance.
Try lubricating the bushings, gears, and slide surfaces once a month to keep them from wearing out prematurely.
When lubricating, make sure to wipe off any excess and let the lubricant seep into the bearing surfaces before putting the router back together.
Lubrication will help keep the system running at maximum power and efficiency.
Storage
It’s important to store your router tool properly to keep it safe and in working condition.
Make sure to keep it away from excessive heat and humidity and away from any liquids.
When packing up your router tool, put it in the designated soft carrying case that should have come with it.
If the case didn’t come with it, you can purchase a separate case.
Always make sure to place all of the router tool elements, such as the blades, into the same case as it.
Finally, store your router tool in a dry location.
Conclusion
Summary
DIY projects have quickly become a popular hobby, and router tools can be a great addition to any project.
From creating intricate shapes to trimming large surfaces, DIYers can benefit from the wide range of applications offered by router tools.
Whether building a piece of furniture or a desk, router tools can save time and make the job a breeze.
For woodworking projects, making large and small designs is much easier with a router than with other tools, and it can also come in handy for screening or engraving.
For any DIYer, router tools provide an incredible number of uses in completing their projects.